- ECT
- RFET
- PAUT
- HTPAUT
- TOFD
- EMAT
- SRUT
- Automated UT Corrision Mapping
- HTAUTCM
- HIC&SWC
- Robotic Video Crawler
- Leak Detection
- AUT ZONAL
- Magnetic Flux leakage (MFL)
- IRIS
- Magnetic Flux leakage – Tank(MFL)
- Borescope- Ge Mentor Visual IQ
- Surface Eddy Current Array (ECA)
- Non Metallic ANDT solutions
- HTHA Detection and Sizing
- Thermography Inspection
EDDY CURRENT INSPECTION (ECT)
Introduction & Basic Information
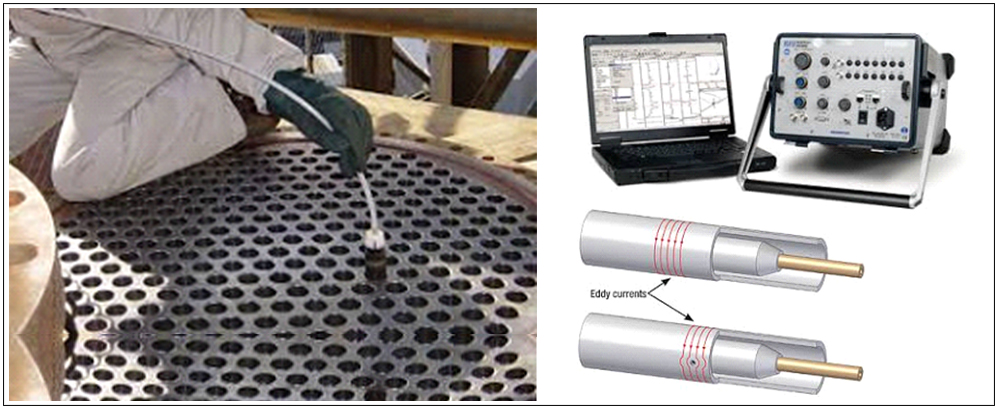
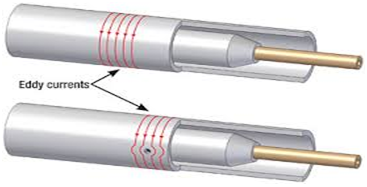
Eddy currents are created through a process called electromagnetic induction. When alternating current is applied to the conductor, such as copper wire, a magnetic field develops in and around the conductor. This magnetic field expands as the alternating current rises to maximum and collapses as the current is reduced to zero. If another electrical conductor is brought into close proximity with this changing magnetic field, current will be induced in this second conductor. Eddy currents are induced electrical currents that flow in a circular path. They get their name from Eddies, which are formed when a liquid or gas flows in a circular path around obstacles when conditions are right.
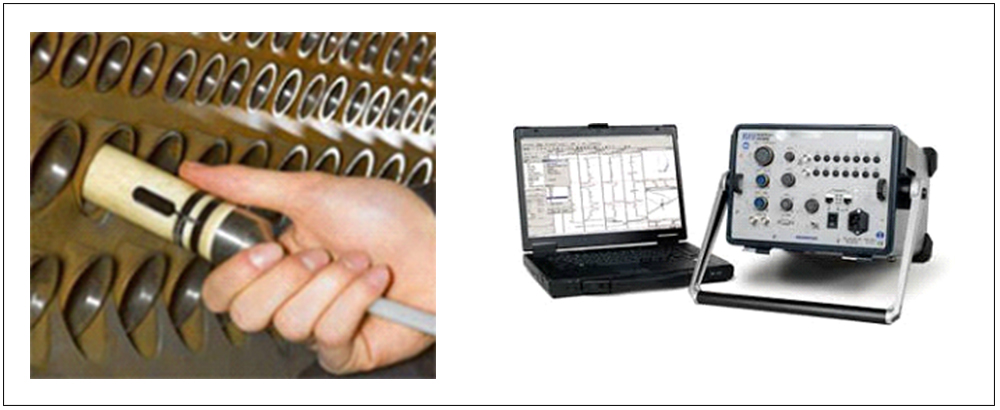
ID probes, which are also referred to as Bobbin probes or feed-through probes, are inserted into hollow products, such as pipes, to inspect from the inside out. ID probes have housing that keeps the probe centered in the product and the orientation of the coil(s) somewhat constant relative to the test surface. The coils are most commonly wound around the circumference of the probe so that the probe inspects an area around the entire circumference of the test object in one go.
REMOTE FIELD EDDY CURRENT (RFET)
Introduction & Basic Information
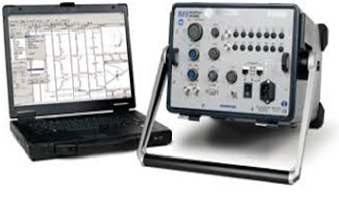
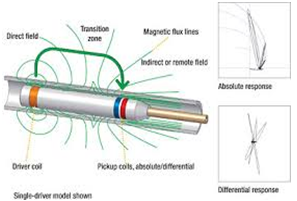
Remote Field is a technique used for the inspection of tubes made of ferrous materials, like Carbon steel and Chrome-Molybdenum. RFT is only one of the techniques available for inspection of carbon steel tubes. Since al inspection techniques that are available for carbon steel have limitations compared to conventional eddy current, it is even more important to select the most suitable technique for each different situation. For the inspection of carbon steel tubes it is often recommended to use a combination of one or more techniques. Overall wall-loss can be easily detected and accurately quantified. Local defect scan be detected and quantified provided that they have some volume (diameter pit >5 mm). RFT can detect both in- and external defects but it is not possible to distinguish between them.
Widely used in Steel, Automotive and Aerospace industries, the eddy current method is one of many electromagnetic testing methods used in Non Destructive Testing (NDT). It making use of electromagnetic induction to detect and characterize surface and sub-surface flaws in conductive materials.

PHASED ARRAY ULTRASONIC TESTING (PAUT)
Introduction & Basic Information
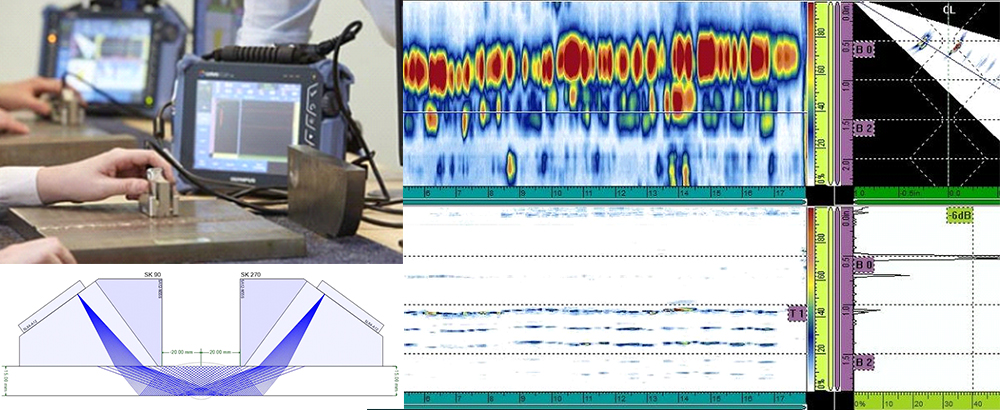
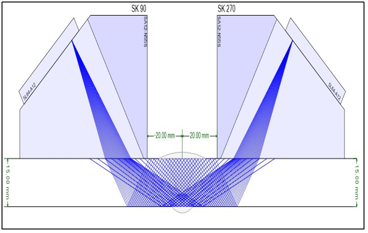
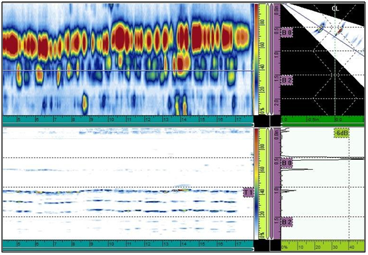
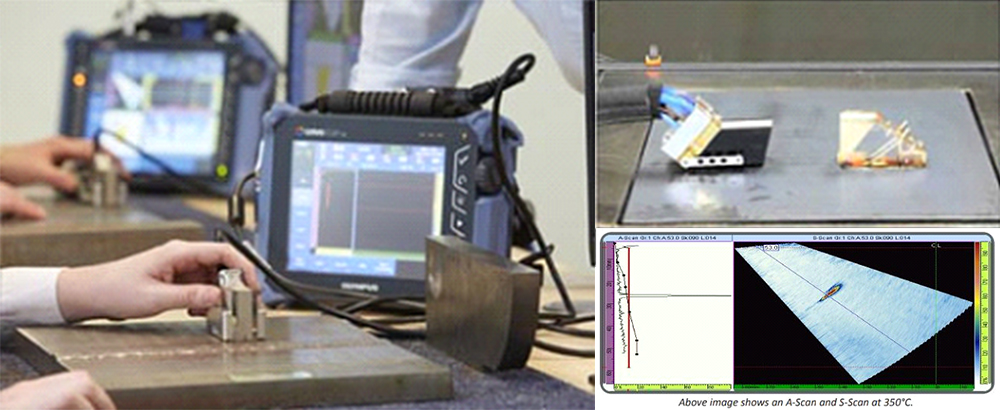
Phased Array Ultrasonic Testing (PAUT) is an advanced nondestructive examination technique that utilizes a set of ultrasonic testing (UT) probes made up of numerous small elements, each of which is pulsed individually with computer-calculated timing. more complex geometries that are difficult. PAUT can be used for more complex geometric weld inspections, high thick materials and crack detection. Advantages are, it can be conducted more quickly, used for repeat scans because it has a high degree of repeatability, it is able to create detailed and accurate cross-sections of a part, gives a permanent record, Gives information about lateral position of defect in weld (depth and height), No radiation, higher POD.
Application
PAUT is widely used in Oil & gas, nuclear Industries (Refinery’s, Petrochemicals of piping, boilers, pressure vessels, clad material, Storage Tanks, In-service weld inspection including Stress Corrosion Cracking, Complex Geometries – Nozzles, Flanges, Shafts, bolts)
HIGH TEMPERATURE PHASED ARRAY ULTRASONIC TESTING (HTPAUT)
Introduction & Basic Information
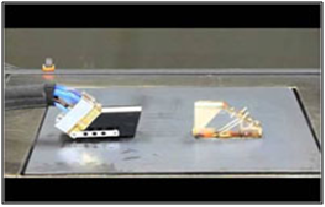
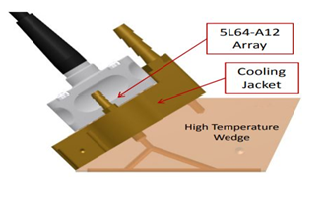
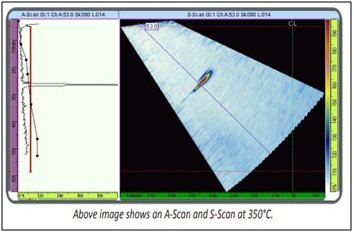
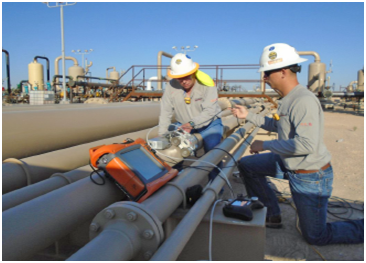
Although most ultrasonic flaw detection and thickness gauging is performed at ambient environmental temperatures, there are situations that require inspections be completed at elevated temperatures. This is a common requirement in process industries where high-temperature pipes or tanks are inspected while on-line. The system is specifically designed to operate at elevated temperatures and is used to evaluate the condition, particularly corrosion and weld inspections, of ferrous structures including storage tanks, pipelines, pressure vessels, Reactors and other critical equipment. The ThermalScan-700 is the best and the most cost effective solution for performing high temperature AUT/NDT scans on surfaces up to 700° F. This air cooled automated 2-axis scanner can scan at up to 30″ (760mm) per second on the arm and up to 5″ (125mm) per second on the wheels. It will scan on items ranging from 3 inch pipe to flat surfaces at temperatures up to 700°F (370°C) utilizing its compressed air cooling system.
Application
HTPAUT is widely used in Oil & gas, nuclear Industries (Refinery’s, Petrochemicals of piping, boilers, pressure vessels, Storage Tanks, Reactors)
TIME OF FLIGHT DIFFRACTION ULTRASONIC TESTING (TOFD)
Introduction & Basic Information
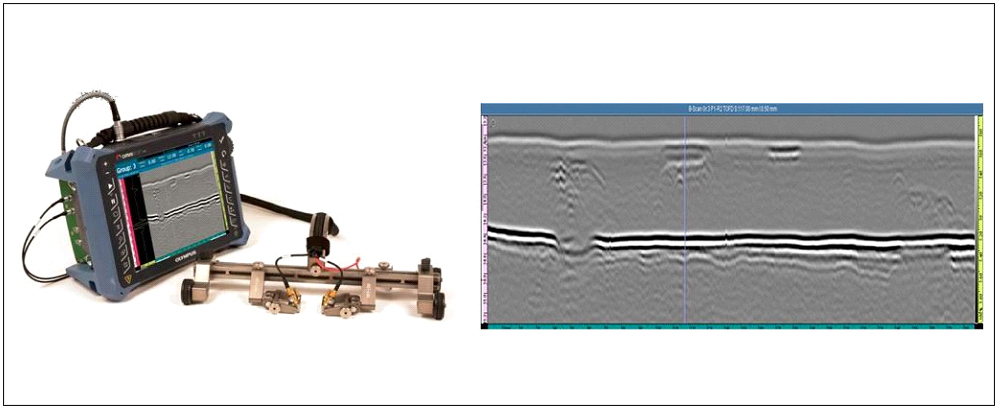
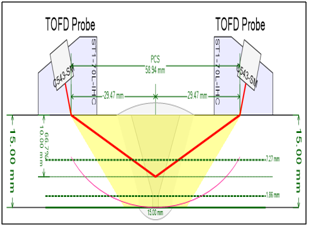
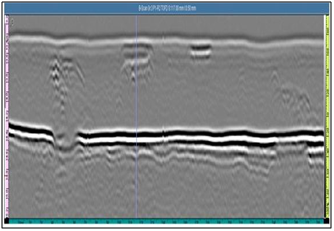
Time of Flight Diffraction (TOFD) is a reliable and fastest method of nondestructive ultrasonic testing (UT) used to look for flaws in welds. TOFD uses the time of flight of an ultrasonic pulse to find the location of a reflector. It can also be used for weld overlays and the heat affected zones of other components as well such as piping, pressure vessels, clad material, storage tanks and structural steel. PAUT + TOFD combination is commonly used to inspect pipeline welds. To do this, TOFD uses a pair of ultrasonic transducers, one as a transmitter and the other as a receiver. The low frequency waves propagate at an angle and only diffract back to the receiver if they hit a defect. If this happens, the time it takes for both waves to make it to the receiver can be used to create a complete image of the weld and identify the size and location of the damage. Advantages are, high degree of repeatability, no radiation, higher POD, cost saving, more sensitive, Quick setup, precise sizing.
Application
TOFD is widely used in Oil & gas Industry, nuclear, (Refinery’s, Petrochemicals of piping, pressure vessels, clad material, In-service weld inspection)
ELECTROMAGNETIC ACOUSTIC TRANSDUCER (EMAT)
Introduction & Basic Information
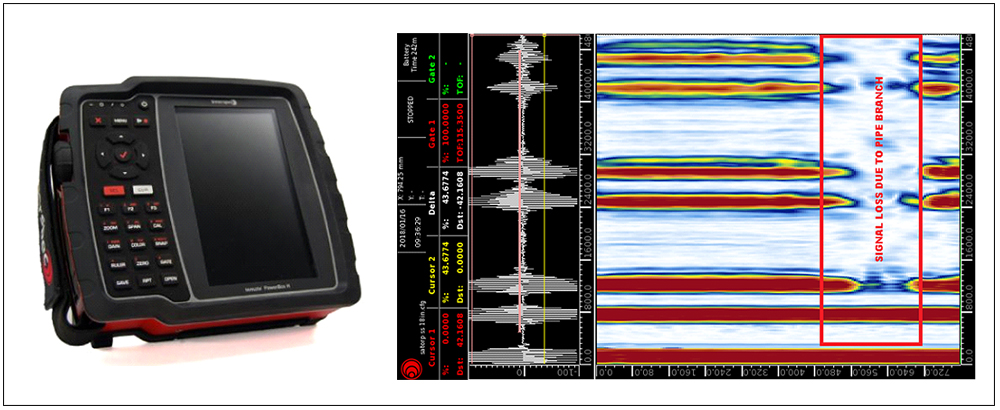
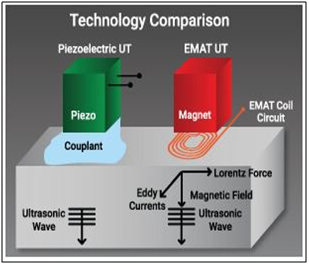
Electromagnetic acoustic transducer (EMAT) is a transducer for non-contact sound generation and reception using electromagnetic mechanisms. EMAT is an ultrasonic nondestructive testing (NDT) method which does not require contact or couplant, because the sound is directly generated within the material adjacent to the transducer. Due to this couplant-free feature, EMAT is particularly useful for automated inspection, and hot, cold, clean, or dry environments. EMAT is an ideal transducer to generate Shear Horizontal (SH) bulk wave mode, Surface Wave, Lamb waves and all sorts of other guided-wave modes in metallic and/or ferromagnetic materials. As an emerging ultrasonic testing (UT) technique, EMAT can be used for thickness measurement, flaw detection, and material property characterization. Advantages are, Dry Inspection, Easier sensor deployment, Ability to generate SH modes, less sensitive to surface conditions.
Application
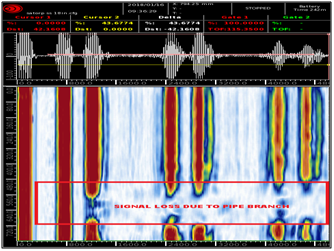
EMAT is widely used in Oil & gas Industry, chemical, metal manufacturing and processing, automotive, railroad, pipeline industries (In-service piping, Tubulars, Wall thickness under pipe support, Vessels)
SHORT RANGE ULTRASONIC TESTING (SRUT)
Introduction & Basic Information
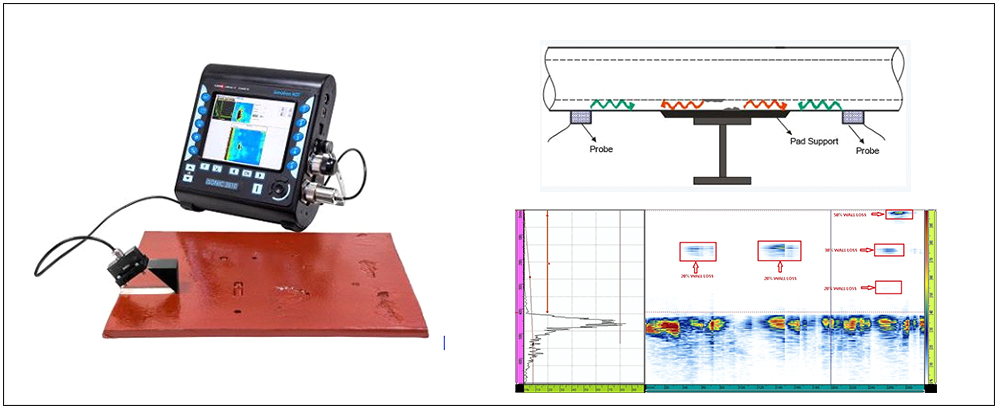
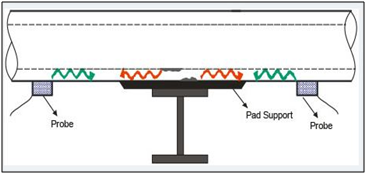
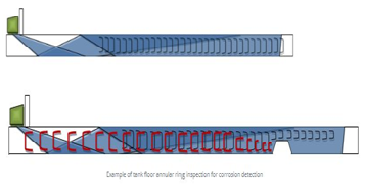
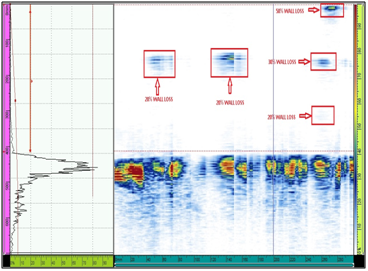
Short Range Ultrasonic testing (SRUT) is one of the Ultrasonic test methods wherein the ultrasonic waves are transmitted in the form of pulsed guided laminar waves using special purpose ultrasonic probes. When laminar waves hit discontinuities (corrosion, pitting & erosion) they are mode converted and the reflection of the waves are detected by the transducer. SRUT is a screening non-destructive test method to detect corrosion on the pipe wall or plates concealed under support structures or structural shell. SRUT is a screening technique used on wall thickness range of 6 to 25mm, this test method can locate the discontinuity location and size to an accuracy of ±10%. The special SRUT probe is placed away from the area of interest to scan up to 1metre of material length without losing adequate sensitivity. Advantages are, SRUT is a fast method, Recordable & Tracible, limited access.
Application
SRUT is widely used for annular rings inside the storage tanks, pipe walls above support and under insulation, air to soil interface of the steel poles, inspection of road crossings and buried pipes.
AUTOMATED CORROSION MAPPING (AUTCM)
Introduction & Basic Information
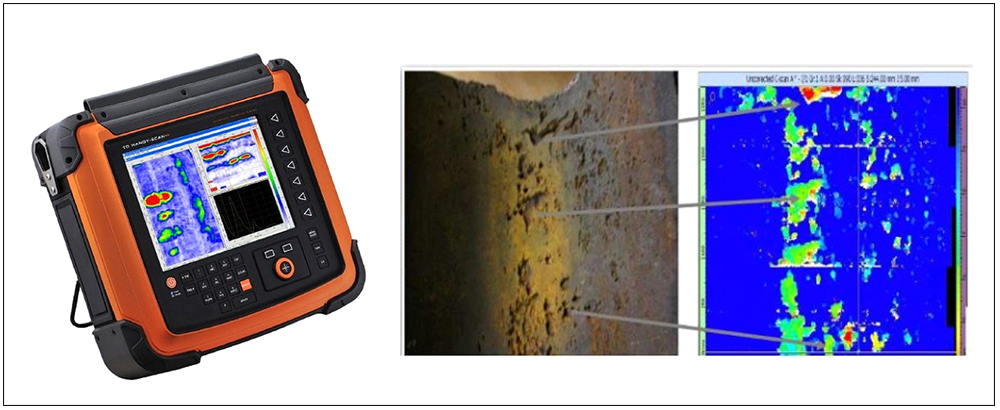
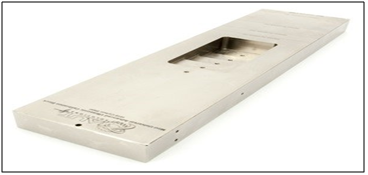
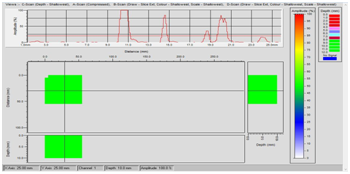
Corrosion Mapping is an ultrasonic technique which maps and identifies variations in material thickness due to corrosion. Corrosion is the deterioration of a metallic material by chemical (or electrochemical) attack. This is normally caused by the environment (most often water), and sometimes by another material. To perform corrosion mapping an automatic or semi-automatic scanner is used to scan an inspection surface, using various ultrasonic techniques including pulse echo, eddy current and phased array. The data is stored on a computer and may be color coded to show differences in thickness readings. Results for corrosion mapping provide a high degree of repeatability and the advantage of position and size data for every flaw which can be compared for repeat scans of the same area to track flaw growth or corrosion rates both generally and for individual pits.
Application
AUTCM is widely used in the oil, gas and nuclear industries for the inspection of pipework, pressure vessels, storage tanks and reactors to check corrosion, erosion, pits, lamination and dis-bonding.


HIGH TEMPERATURE AUTOMATED CORROSION MAPPING (HTAUTCM)
Introduction & Basic Information
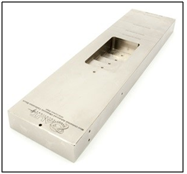
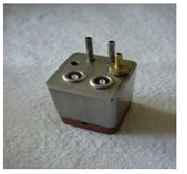
Most ultrasonic flaw detection and thickness gauging is performed at ambient environmental temperatures, there are situations that require inspections be completed at elevated temperatures. High Temperature Corrosion Mapping(HTCM) is an advanced ultrasonic technique which maps and identifies variations in material thickness due to corrosion, Erosion at elevated temperatures up to 350°C. This is a common requirement in process industries where high-temperature pipes or tanks are inspected while on-line. The system is specifically designed to operate at elevated temperatures and is used to evaluate the condition, particularly corrosion and weld inspections, of ferrous structures including storage tanks, pipelines, pressure vessels, Reactors and other critical equipment. The data is stored on a computer and may be color coded to show differences in thickness readings.
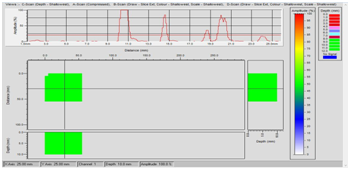
Application
HTAUTCM is widely used in Oil & gas, nuclear Industries (Refinery’s, Petrochemicals of piping, boilers, pressure vessels, Storage Tanks, Reactors)
HYDROZEN INDUCED CRACK & STEPWISE CRACK DETECTION (HIC&SWC)
Introduction & Basic Information
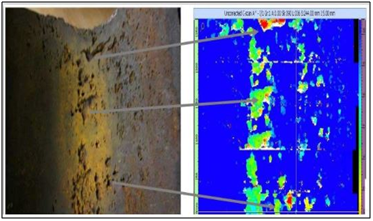
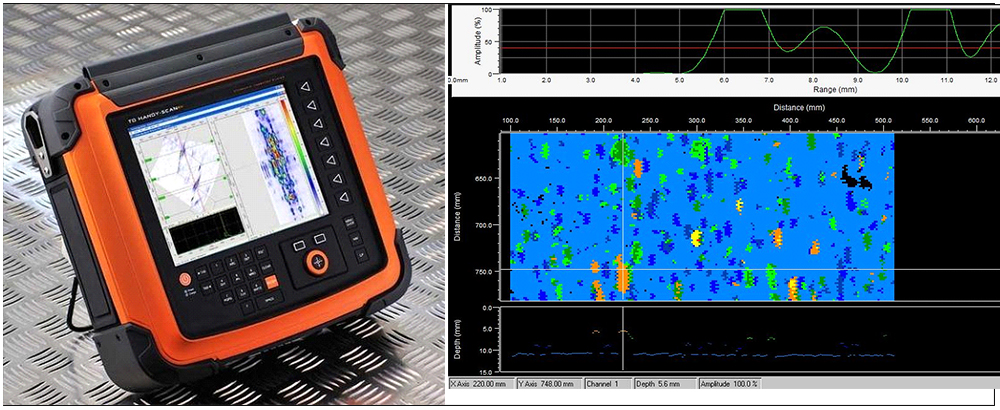
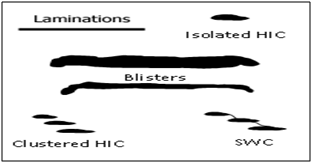
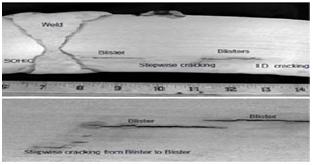
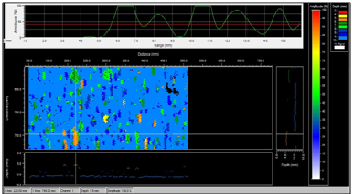
Hydrogen Induced Cracking (HIC) is a common form of wet H2S cracking caused by the blistering of a metal due to a high concentration of hydrogen. The blistering damage tends to form parallel to the surface and to the direction of hoop stress. Hydrogen atoms are generated by corrosion reaction of H2S and Fe in present of free water. The hydrogen atoms, which have the smallest atomic elements are diffuses into steel and traps in mill laminations or voids. Then, every two atoms combine to form hydrogen molecular. The mechanism of HIC is similar to that for hydrogen blistering. If two or more adjacent blisters are close enough so that the crack tips are overlap, a series of stepwise cracks (SWC) will be developed. In this stage, a potential dangerous situation which could lead to rapture and gas leak.
Application
HIC-SWC detection is widely used in the oil & gas and petrochemical industries for the inspection of in-service pressure vessels, heat exchangers, pipe lines, storage tanks and reactors.
ROBOTIC VIDEO CRAWLER
Introduction & Basic Information
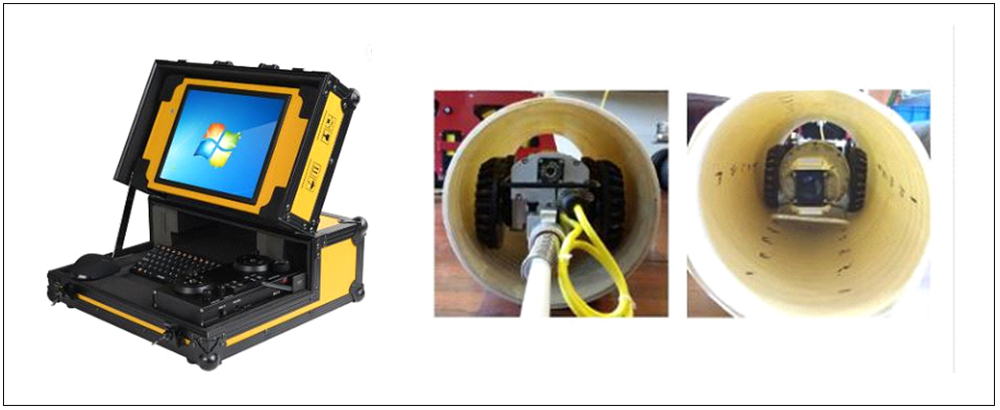
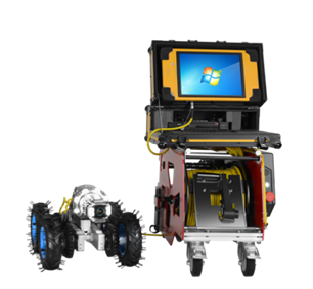
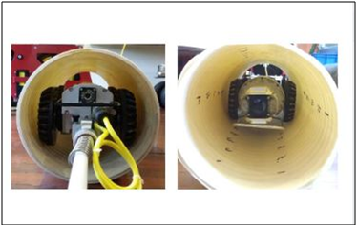
Robotic Video Crawler is a advanced borescope method to assess the internal conditions of tubes, Pipes, vessels, etc., and record the observation in the movie format using remotely operated video Crawler equipment. The tubes and piping to be inspected shall have access to insert video Crawler and to carry out Visual inspection. By using this we can inspect piping greater than 10inch diameter. Visual examination is generally used to determine such things as the surface condition of the part, alignment of mating surfaces, corrosion, erosion, cracking, oxidization, distortion or evidence of leakage, bulging, sagging, etc. When Visual inspection is performed, the Video Crawler system shall have the same resolution as direct visual examination. The Video Crawler camera shall be articulated/focused, and the images shall be displayed as video or image formats. The results shall be recorded in the hard disk for future reference.
Application
Robotic Video Crawler is widely used in the oil & gas and petrochemical industries to assess the internal conditions of tubes, Pipes, vessels, tanks etc.,
LEAK DETECTION
Introduction & Basic Information
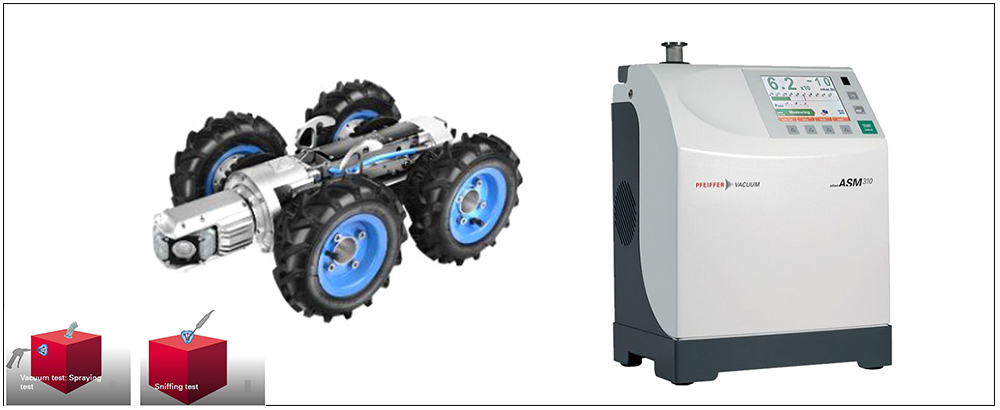
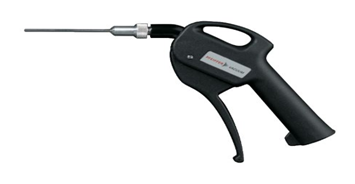
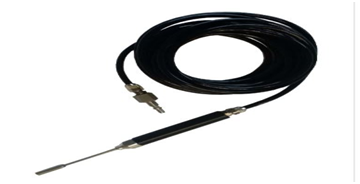
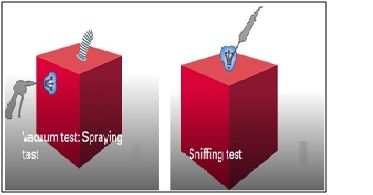
In non-destructive testing, a leak is defined as a hole, a porous area, a permeable area for gases or a different structure in the wall of a test specimen through which a gas can escape from one side of the wall to the other due to a difference in pressure or concentration. Expressed in simpler terms, leaks are small holes through which gases or liquids flow from the side of higher pressure to the side of lower pressure. A leak can be a harmless leak such as a dripping water faucet. Leaks involving the escape of aggressive media or toxic substances can have more serious consequences. Helium leak detectors are the ideal solution for leak detection and leak-tightness testing under vacuum. The test gas Helium is safe and a small, light molecule which is suitable for detecting micro leaks. The detection range of Helium in vacuum tests lies between 10-2 and 10-13 Pa · m3/s. Helium leak detection is extremely accurate, quantitative and repeatable. Fast cycle times are a further advantage. Manual sniffing or spraying is often the easiest way to detect a leak with Helium gas.
Application
Leak Detection is widely used in the oil & gas and petrochemical industries to detect the leaks.
AUTOMATED ULTRASONIC TESTING OF GIRTH WELDS USING ZONAL DISCRIMINATION (AUT ZONAL)
Introduction & Basic Information
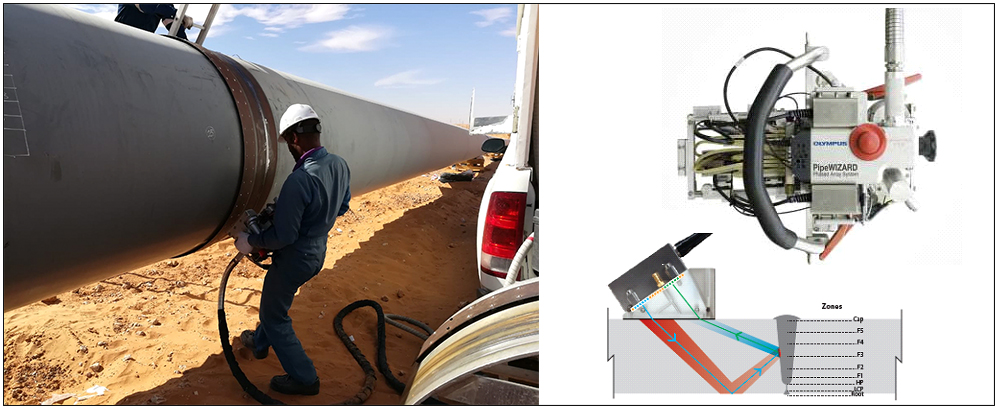
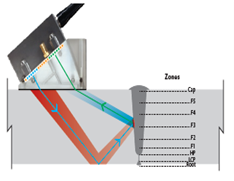
Pipelines perform a critical function in the global economy, transporting huge volumes of gas, oil, water, and other chemicals. Pipes are girth-welded on-site, typically using automated welding systems. For pipelines, welds are the “weak spot” as this is where defects tend to occur. Welds are nondestructively tested, coated, and buried or laid on the sea bed. Due to the demanding construction cycle, it is important that weld defects be detected and analyzed very quickly. Automated ultrasonic testing (AUT) has begun overtaking traditional radiography as the pipeline weld inspection method of choice throughout the world. Radiography has significant limitations: poor detection of planar defects, no vertical sizing capability, safety issues, and environmental concerns. The PipeWIZARD is an automated girth weld inspection system which is suitable for in-site weld-to-weld inspection in extreme environments. It uses conventional UT and phased array techniques. Electronic beamforming is used by phased arrays for producing and receiving ultrasound. The phased array systems are suitable for offshore and onshore pipeline construction projects. The PipeWIZARD system has resistance to electromagnetic interference, vibration and shock. Based on the pipe diameter, weld type, environment and location, the time of inspection cycle varies from 2 to 6 min. Defects detected by the PipeWIZARD system are incomplete penetration, burn through, porosity, lack of fusion, undercut, cold lap, hi-low, crack, inclusion, etc.
Application
AUT Zonal technique is widely used in oil & gas industries mainly for pipeline weld inspections. The PipeWIZARD system is versatile and allows the inspection of special weld configurations and applications like Cladded pipe, seamless pipe and thick pipes.
MAGNETIC FLUX LEAKAGE (TUBULAR)- MFL
Introduction and Basic Information
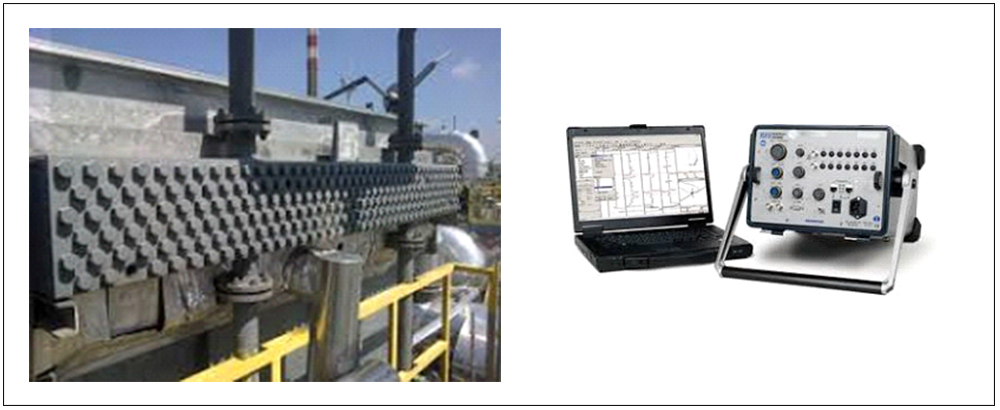
Magnetic Flux Leakage testing (MFL) is a technique used for the inspection of tubes made of ferrous materials. This technique will normally be applied as a fast screening technique if small diameter pitting is expected. Because of limitations to its sizing abilities Magnetic Flux Leakage testing is not often used as a stand-alone technique, and verification by other techniques is recommended. An advantage of MFL Testing for inspections is that it can also be used on finfan cooler tubes.

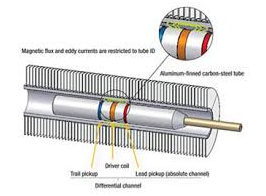
The probe in the MFL Testing technique contains permanent magnets which are utilized to form a magnetic flux field in the tube wall. Defects will influence the path of the magnetic field and will cause some of the flux to leak out of the tube wall. This leakage field will be picked up by the coils and the Hall-effect sensors in the probe. Size of the leakage field is determined by pull speed of the probe and by the shape, the dimensions and the location of defects. Signals that represent the size of the leakage field and thus the condition of the tube are presented on a computer screen.
internal rotatory inspection system (iris)
Introduction & Basic Information
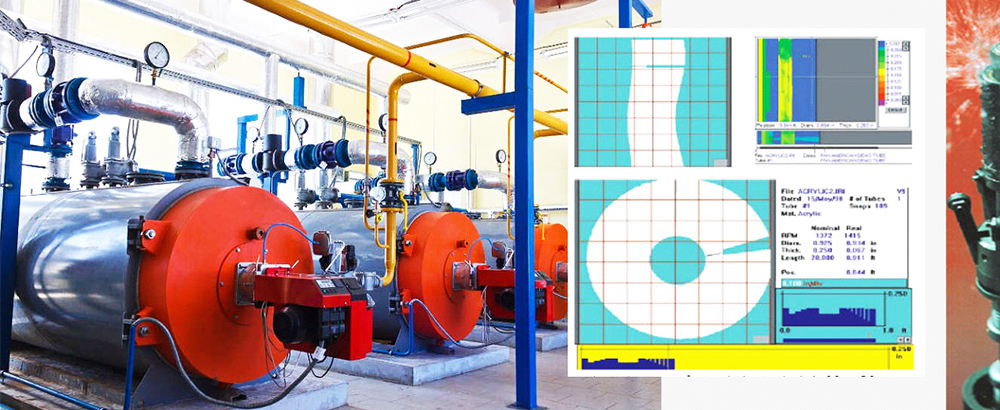
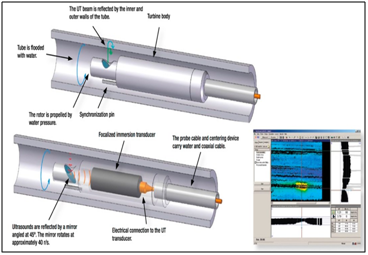
Internal rotary inspection system (IRIS) is an ultrasonic method for the nondestructive testing of pipes and tubes. The IRIS probe is inserted into a tube that is flooded with water, and the probe is pulled out slowly as the data is displayed and recorded. The ultrasonic beam allows detection of metal loss from the inside and outside of the tube wall. The IRIS probe consists of a rotating mirror that directs the ultrasonic beam into the tube wall. The mirror is driven by a small turbine that is rotated by the pressure of water being pumped in. As the probe is pulled the spinning motion of the mirror results in a helical scan path
Application
Field-proven and commonly used in boilers, heat exchangers, and fin-fan tubes

MAGNETIC FLUX LEAKAGE- TANK (MFL)
Introduction and Basic Information
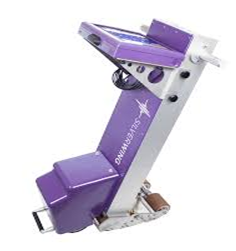
The Floormap3Di-R is fastest tank floor scanner/tank bottom inspection system developed by Silverwing, with scanning speeds of up to 1 m/s which is twice the speed of the previous model. The Floormap will improve your inspection efficiency whilst improving accuracy and data quality.TheFloormap combines two distinct technologies, MFL and STARS. The introduction of STARS (Surface topology air-gap reluctance sensors) enables the scanner to determine whether there is corrosion top side, bottom side or below the surface coating.Improved signal to noise ratio combined with STARS and MFL ensures a more accurate and efficient inspection of coated and thicker plates.
Unlike other manual “stop on defect” systems all the data is captured and stored. This data retention enables tank engineers to compare and review historically pertinent data sets to determine the optimum repair strategy.
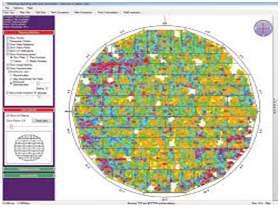
The high resolution sensor heads provide excellent probability of detection down to indications that measure 2mm in diameter. This coupled with advanced signal processing and defect classification tools significantly improves the corrosion detection and sizing capability when compared with previous generation systems.
BORESCOPE- GE MENTOR VISUAL IQ
Introduction and Basic Information
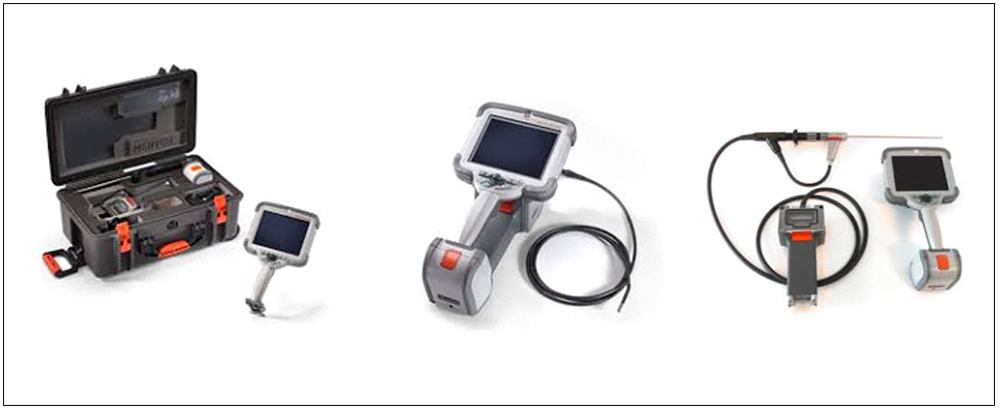
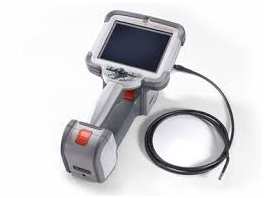
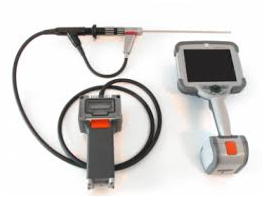
Boroscope inspections are visual inspections in places inaccessible to the human eye with the help of an optical device, the borescope. It was developed in the industrial area following the success of the endoscopies in humans and animals.The borescope, also called video scope or videoboroscopio, a device is long and thin, flexible rod. Inside this tube is a telescopic system with many lenses, which provide a high image definition. It is also equipped with a powerful light source.
Features
Crystal clear live video and still images 16GB of internal memory on the Inspect model 32GB with the Touch & Analyze models 6.5 inch active matrix XGA color LCD display Dual-Band Wi-Fi and Bluetooth 4.0 enabled 212°F (100°C) max operating temp Rolling carry-on case or large work station model Compatible with USB keyboards & storage devices 2 USB 3.0 host ‘A’ ports 1 USB 3.0 client micro ‘B’ port
SURFACE EDDY CURRENT ARRAY(ECA)
Introduction and Basic Information
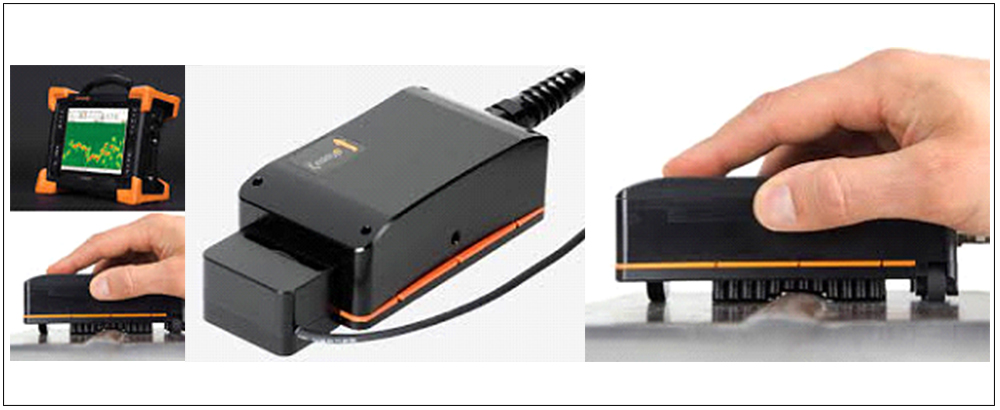
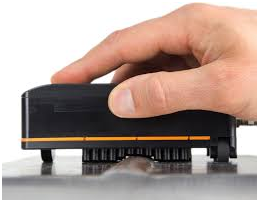
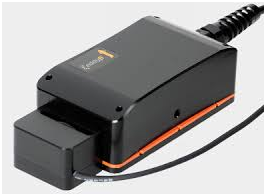
Eddy current arrays (ECA) are the natural extension of ECT. ECAs are composed of arrays of coils that activate in sequences intended to eliminate interference between them. The array slides on top of surfaces, offering an overall wider coverage and better sensitivity to defects than conventional eddy current testing. ECA technology can detect surface-breaking defects and, to some extent, subsurface defects. ECA probes can also be shaped to match more “exotic” geometries, which enable single-pass scanning of geometries that traditionally pose serious challenges to other inspection technologies.
Application
ECA technology is used as an alternative to other surface inspection technologies in such industries as the oil, gas, and petrochemical industry; the power generation and nuclear industries; the aerospace industry; and the heavy equipment and mining industries. ECAs also very successfully supplement ultrasonic testing (UT) and phased-array UT because these suffer from what is often referred to as a “dead zone” near the surface, making it difficult for them to detect near-surface defects.Therefore, surface applications of ECA technology are numerous, ranging from weld inspection on pressure vessels and pipes, to corrosion mapping between wing longerons and skin, by way of dovetail inspection in turbines..

NONMETALLIC INSPECTIONS(GRP/FRP/FLEXI GLASS)
Introduction and Basic Information
Nonmetallic inspections like GRP/FRP/Flexi glass materials inspection is challenging task during Inservice due to several geometrical and material structure constraints. There are several Advanced NDT methods that NDTCCS offering for Nonmetallic material inspection.

Below NDT methods we offer for Nonmetallic materials:
-
Delamination’s verifications by PAUT
-
Joint integrity verifications by X-Ray
-
Wall thickness measurements
-
Video Crawler -Visual examinations
-
Barcol hardness testing
-
Thermography

Coming Soon…


TIR
Introduction
When the sun goes down and the other sources of illumination are removed, there is no light to be reflected and most mammals, especially, cannot see anything. The unaided human eye cannot see infrared radiation, but the radiation is always present. It is heat or thermal radiation in a portion of the Electromagnetic (EM) spectrum to which our eyes do not respond. Our bodies respond to infrared, if it is intense enough, by feeling warmed, or sometimes, cooled.
The IR or infrared portion occupies roughly the region between 10 to the minus 4 to 10 to the minus 3 centimeters, or, from about 1 micron to about 100 microns. Every object at temperatures above Absolute Zero ( 0 K or -273.15 °C) emits thermal radiation, much in the infrared portion of the EM spectrum. Many objects that are very hot emit thermal radiation that is in the visible and even the ultraviolet portion of the EM spectrum as well as the infrared, e.g. an incandescent light bulb or our local star that we call the Sun.
Application
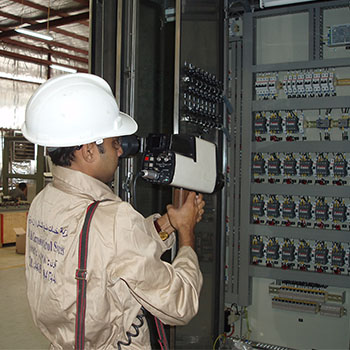
Thermography can be applied in to “anything a temperature difference can be associated with”. Thermography testing is used on Mechanical Inspection for Steam Systems such as Boilers, Tubes, Refractory, traps, lines and for Rotating Equipments such as Bearings, Dryer Drums, Turbines, Pumps, Couplings and for Furances. Also it is used for Electrical Panel inspections, Building roof inspections and Building Inspections.
Primary Advantages
Advantage of Thermography includes that is used portable equipment, applied to scan the equipment while it is operations and result can be evaluated easily.
